
For years I’ve wanted to get a basketball hoop for the pool. But all the typical pool-style setups have small hoops, huge bases and they all end up resting after a few years. If that wasn’t bad enough, they cost between $150-300. No thanks.
There had to be a better solution.
So, I put my dad DIY-hacker hat on and got to work. The first problem to solve was the backboard and hoop. I scoured Amazon but couldn’t find anything that looked worthwhile.
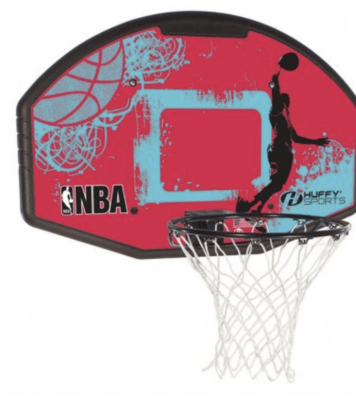
Then I stumbled on this Spalding Rim and Backboard Combo at Walmart. Not only was the size perfect, but it also came with a mounting bracket. All for less than $45!
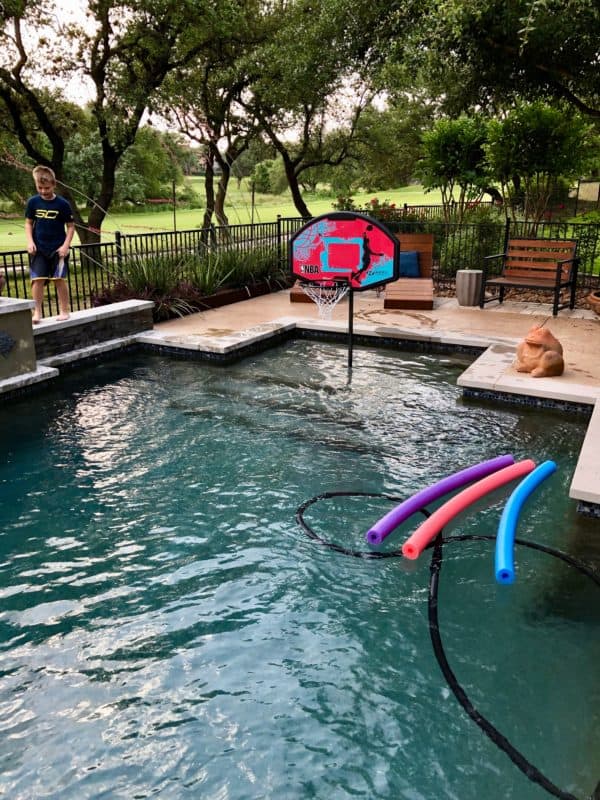
First problem solved. Next, I had to figure out how to mount it in the pool. We happened to have a sleeve in our entryway that was designed for an umbrella (I’ll share some other ideas later if you don’t have one of these ). This spot was perfect. It gave us the most room to play, and since that area is the shallow end, everyone can play.
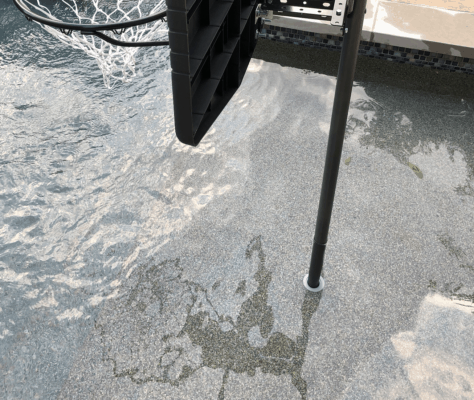
Of course, you don’t want to use just any metal post in your pool. Browsing the aisles of Home Depot, I found the perfect solution. A 5′ long galvanized steel line post. It’s the right height, and it won’t rust.
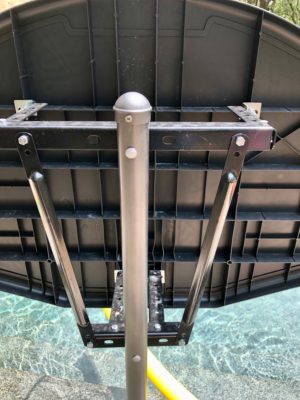
Finally, I had to work on the mounting bracket. For the most part, you can follow the instructions on hooking the bracket to the backboard. Here is a picture of my setup in case you have any trouble.
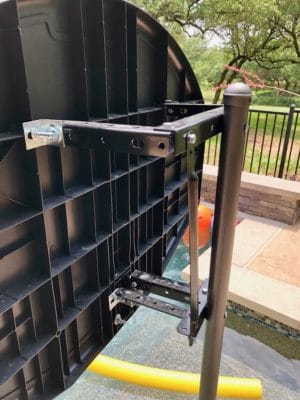
When it came to mounting the bracket to the post, I had to improvise. Instead of using the u-brackets the board ships with, all you need are a few galvanized bolts and nuts. Just drill through the pole and bracket and connect your two bolts. The backboard is so light it’s got plenty of strength to keep everything secure.
Before securing the post to the backboard, you may want to give it a quick coat of paint, or you can leave it as-is. We went with a nice dark gray paint. I’d also recommend picking up a pole cap. Once you have everything painted and secured, you are ready to drop it in.
If you don’t have a sleeve in your pool already, you can still take advantage of this board. If your pool is next to the lawn, dig a hole and concrete a sleeve into the ground. With this method, you can drop it in when you want to play and pull it out at the end of the season.
If you need to set the board up on the pool deck, you’ll need to add a few extra steps. First, you may want to cut down the 5′ long post. The full length may be too much. To hold it steady you can try a few options. The easiest is a Home Depot bucket with a sleeve and fresh concrete. I did this with another yard game, and it worked like a charm.
Of course, the buckets aren’t very nice looking. You could paint it or better yet, get a plastic planting container. This approach will look a lot better, and you can find some that are nice and wide, giving the whole combo better support.
My entire setup only cost about $75 for everything. Not only is this a heck of a lot cheaper than the standard options, but you also get a full-size rim. If you had to install the board in your yard or on the pool deck, you probably need to budget another $25-$50 depending on the cost of the planter you choose.
After using this a few times already, I can tell you it’s an absolute blast. Everyone can enjoy it – whether you play basketball or not.
Good luck with building your own! Feel free to drop me a line if you have any questions.